Showing posts with label Decorating. Show all posts

Ruffled Tablecloth Tutorial

I wanted a simple ruffled tablecloth for my daughter's table, however I found it impossible to find a child's tablecloth, let alone in the right dimensions. Since the legs of the table are a bit marked up I really wanted one that would perfectly skim the floor. So, I did what every other insane person with no sewing skills would do... I made one.

Ruffled Tablecloth Tutorial | Candy Hearts & Paper Flowers


If you know how to sew you may want to skip my ramblings, since you probably have the tools to round the edges and a better way to ruffle the tablecloth. This was just my method with minimal sewing tools, a machine and a pair of scissors and a large handful of pins. Oh and this take a lot of thread, I had to go to the store halfway through my project to get more thread. I realized after typing all this up that I didn't take as many pictures as I thought I did. Hopefully, it's still easy to understand.

Since I had no clue how it would turn out, I didn't want to spend a ton of money on fabric, so I headed to the local hardware store and picked up a paint dropcloth.

I measured across the table in both directions, then added double the height of the table to the floor to each measurement, then since I was adding a 4 inch ruffle, I subtracted 4 inches from both lengths. This gave me a 2 inch margin of error for my seems, if you are an experienced seamstress, subtract 6 inches for a 1 inch margin of error. Then I cut a rectangle that was the total length by the total width. Iron this.

To round the corners, I put the child's table on top of my dining table. I placed the table cloth on it so two adjoining sides just touched the table when pulled taut, then I piled books on top of the child's table so the table cloth wouldn't shift while I was cutting. Starting at one side I just pulled the corner fabric taut down to the dining table and cut the fabric so it skimmed the dining table (floor) until I got all the way around to the adjoining side. I then shifted the tablecloth to an opposite side of the table to do the next corner.

Now measure along the circumference of the table cloth and take that number and multiply by 4 for a nice full ruffle. Cut 5-6" wide strips from the drop cloth, until you get enough to sew together to make the ruffle. I did 6" wide strips, again I wanted a large margin of error for my seams. I trimmed everything up afterwards, next time I would only do 5" for a 4" wide ruffle. I didn't really know what I was doing and wanted to make sure I wasn't messing anything up.

So I sewed the strips together to get 1 long 6" wide strip. Then I ironed the strip, and ironed down 1" edges to get a 4" wide strip. Then I hemmed the edges and trimmed my excess fabric.

Now the crazy part!!! Since I have a super long strip of fabric there is NO way I was going to do the typical ruffling method of a really lose straight stitch and pulling one thread carefully for that much fabric. For sure I'd have broken a thread and ended up very frustrated. So I looked around the internet for a bit for ruffling methods. What I did was very easy, though it required very careful sewing. I was using a heavy-duty thread since I was working with such a thick rough material, so about 3/4" from the top edge of the ruffle I laid down one end of a new spool of the thread and zig sag stitched over the top of it, being very careful to keep the thread in the middle of the stitch and not catch it with my sewing machine needle. I used the widest zigzag stitch I could.

Ruffles made simple: zigzag over a thread, pull the straight thread to bunch up the ruffle | Candy Hearts & Paper Flowers
Zigzag over a thread, pull the straight thread to bunch up the ruffle


Once I was done I measured the fabric strip and using safety pins I pinned the fabric at 1/4, 1/2 and 3/4 the length of the fabric. Using the pins as guides I could make sure the fabric was somewhat evenly ruffled and make sure that my final length of the ruffle would match what I needed to sew around the tablecloth. So holding tight to the thread that you laid down in the middle, gently start pulling it and bunching the fabric up.

After it is uniformly bunched and the right length, use about 8 pins to roughly pin it to the tablecloth to check for length. If you are satisfied with the length, unpin the ruffle and sew the ends together. You should now have a big long ruffled ring of fabric. Now carefully measure and center the tablecloth in the center of the table and every 3-4" inches pin the ruffle to the table cloth so it will just skim the floor. (I pinned mine up on tv trays, it was easier to see the length.)

Pin the ruffle so it skims the floor; use a table or tray tables to bring it to eye level | Candy Hearts & Paper Flowers
All pinned on, waiting to sew

Once it is all pinned you are going to sew right in the center of the zigzag stitch you did earlier with a straight stitch.

You are done!

I had no idea what I was doing and figuring things out as I went along and it took me the better part of an afternoon and evening. I also have a 2 year old daughter that I was getting interrupted by fairly constantly. She didn't like that I was holding her table hostage! However she loves her pretty table! Now to make slipcovers for her little chairs, I bought a "Making slipcovers" DVD, time to break that out again.

Ruffled Tablecloth

We were given a child's table from my mother-in-law to use in Kirsten's bedroom.  It was once her play table when she was young. After years of be stored in the barn, the chrome has seen better days and the top is a bit beat up. It's a great vintage child's table and will be great just polished and cleaned up in a playroom in the rec room in the future.  For now though I'd like Kirsten to be able to use it in her bedroom, and it doesn't quite fit the aesthetics in her room.  So, I sewed a tablecloth that just skims the floor all around with a ruffle at the bottom.  Now I just have to make some little slipcovers for her chairs to match.  My husband is going to cut a piece of plexiglass to fit on top so she can use the table for art projects without mommy fretting too much. I'll put together a simple tutorial/how-to of my process.  I don't really know how to sew, so if I can do this, anyone can.  The ruffle was the hardest part since it was so long.


Here is the table before, a great little table, but it doesn't really fit in her room.

Bookshelf - Done

Ever read the blogs of other bloggers and they show you gorgeous rooms that they transformed in a weekend? Layla of The Lettered Cottage is a great example of this, or Jessica of Four Generations, 1 Roof. I'm most definitely NOT a good example of this! I've been working on my daughter's big girl room, slowly but surely for over 6 months now.

 The back is a light pink, but can easily be changed over the years.
I really need a wide angle lens to get better pictures of her room.
 And the light that finally allowed me to get some pictures that weren't grainy or dark!
 It's the Pink Alyssa Chandelier from Pottery Barn.


Want a peek of the old light? It had a single bulb in it and the room was terribly dark for pictures.


First, she moved in to an empty room with just a bed
Then I painted some shelves and added some knick knack's and a couple of pictures.
Then I refurbished 2 chairs and a rocking chair
Then I cleared out her closet and brought in about half of her clothes
Then DH built a bookshelf for her and I painted it and filled it with books and toys and her menagerie of stuffed animals.  She promptly emptied the stuffed animals back into her bed.

Remaining list to be completed:
Tablecloth for her table
6 picture frames to be built
Bedside table to be built - wait until you see what I have in store for this!
Toy box to be built
Closet to be gutted and redone (I was using it as an office/desk area)
When we are ready to put new flooring in the house we'll rip out the wallpaper and put up board and batten and shaker pegs

Bookshelf

Earlier this month I shared the chairs I worked on for Kirsten's room. Then we started working on the bookshelf. Hubby built a really nice big sturdy bookshelf to my exact specifications, and it's perfect. He made it out of pine since I intend to paint it white. He put some nicer fronts on the shelves and a routed edge on the top.

I got the back primed in the evenings, intending to do the shelves over the weekend. And then it got hot, like unbearable to work in the garage for 2 hours at a time even with the garage door wide open hot. So, he and I managed to get 1 coat of primer on it one Friday afternoon about 2 weeks ago, and it has sat like that since then. The back is done, but the shelves top and side still sit paintless. This weekend is supposed to be all thunderstorms, but today... today is beautiful. So, as soon as I get home this afternoon, I will be putting the 2nd coat of primer on it. Hopefully, if all goes well it will be in her bedroom before next weekend. I'm anxious to move more of her stuff into her room, so it will feel more like her room to her.


We've been spending weekends at county fairs and the drive-in theatre and at birthday parties and a wedding. Enough fun though, I'm ready to get back to work and get her room finished up.

Rocking Chair Makeover

I thought I should stop for a bit and actually share some of what's been going on around here. I've been working on all sorts of little projects for Kirsten's big girl room. The first project was a complete makeover of a rocking chair we bought at a garage sale.


It was only $13 and I knew I'd be painting it when I bought it. It was an old child's rocking chair that had been black at one point, then painted green.


Originally, I was going to try to salvage the seating, and just replace it one day when my daughter killed it. After turning it over though it looked as if it had sat in water possibly. So I decided to go ahead and replace it. A few minutes with a hammer and screwdriver later I was looking in between the caning and I'm so very glad I chose to replace the seat. It has definitely sat in water at some point. Ick!


So, left with just the bones of the chair I spent a few days sanding, priming, painting and hubby helped me build a new seat for it. I painted the chair in Valspar Signature Waverly Clean White in an eggshell finish. I wanted it to have very little sheen, but still be able to wipe it. 


Her name is painted in a blend of a pink and white I had on hand, so I don't have a paint name for it. I wanted a very pale pink, so it wasn't obvious unless you were within a few feet of the chair. It turned out exactly how I imagined.


We measured and cut a leftover piece of plywood we had in the garage to fit for a seat. I covered it with a piece of foam cut to fit and sheet of polyfil and finally white cotton. I covered the bottom with a piece of outdoor fabric cut to fit the size of the base of the seat. I didn't want threads or bits of fabric or foam or anything exposed that she might be tempted to pull at.


I absolutely LOVE the way it turned out! Most importantly though, Kirsten LOVES her rocking chair.


And the before and after again. This was the first little bit of furniture I've tackled, but I have a bunch more to share this week.  We've been busy here!

Big Girl Bed

My intent was to move Kirsten into a toddler bed for a couple of years and eventually into a twin back in what is the nursery after the next baby outgrows it.

You can see the initial plan in this post, toddler bump bed included. To recap with just the image and sources:
Image sources from top right: Bump Bed; Canopy; Side Table;
Doily LampToy BoxTable and Chairs; Bookshelves;
Shaker PegsBoard and Batten; Fairy Lights

I absolutely fell in love with the bed we bought her when I saw it, and am reworking the room a little bit around the bed. Since the bed is twin sized, I have a round white ottoman I am putting at the foot of the bed. I can still do the canopy around it. I do have to come up with a solution for books.  Maybe a small basket next to the ottoman or under her nightstand.  She doesn't need a lot of books in her big girl room just a few to read each night, the family room and nursery both have wall to wall bookshelves with lots of room for the books.
Beautiful Rosemaling Bed by Hob Nob Artisan
Just a quick word about the bed, I got it from Hob Nob Artisan on etsy.  Jennifer is the seller and she was AMAZING! It's obviously a bigger item, so we were coordinating shipping and such and sent quite a few emails back and forth with each other by the end of the transaction. She was a dream to work with and I would definitely buy from her again as a seller. Plus, her rosemaling and attention to detail is absolutely beautiful! I also got a little matching shelf for her room which is hung above her bed right now, I'll get a nice picture of it once I style it.
Rosemaling bed by Hob Nob Artisan on etsy
Footboard Rosemaling detail
About four years ago, Meadowbrook moved from downtown to a mall area. When they did, they had a large sale of floor models and decor that they had used that hadn't been for sale, rugs, lighting, cabinets, etc. Well, I bought a rug for our family room, but I also bought some very nice linen Battenberg lace shelf liners, 2 for $5. I had no particular plan for the liners, I was thinking initially as a bit of a runner for a table by my kitchen window, but they were way too long and it just looked awkward trying to adjust it. I folded them up and tucked them away figuring I might fashion them into a valance or something eventually.

Well, I need a bed skirt for my daughter's bed and I've been looking online and white pretty ones aren't cheap.  Even a simple white twin bed skirt with no frills is about $20-$30. So, I decided to make one, something simple nothing fancy. Well, when I was trying to find a white bed sheet to use for a bed skirt and to cover some kids chair seats, I found these all folded up and tucked away. Perfect! I ironed and and ironed and ironed some more, they were terribly wrinkled. And they are a perfect fit for her bed! It really was fate. There are two shelf liners and they are the perfect size lengthwise for the length of the bed, and folded in half they perfectly fit the end of the bed.  I do need to adjust the length a tiny bit on the end, a bit of tucking and pulling will fix it. All in all though, I think it turned out perfectly!

Battenberg lace shelf liner bed skirt
The improvised shelf liner bed skirt, it needs a slight adjustment here

Battenberg lace shelf liner bed skirt
The improvised shelf liner bed skirt
 The most important part is that my daughter absolutely loves her big girl bed, although she hasn't slept in it yet. We're easing her in slowly, plus she'll like it more when she has more of "her stuff" in the room.


Bye Bye Library

Rosemaling Bed in Kirsten's Big Girl Room

So, last Thursday evening my daughter climbed up the side of her crib and fell out with a big thud. Her crib is fairly deep, deeper than average, it was one of the reasons I was smitten with her round crib. I've been planning to move her in to a big girl bed for potty training for a little while now, but first we had to clear room in the basement to move all of the bookcases out of my library/office. I also needed a new home for my office which was previously occupying the closet of the library.

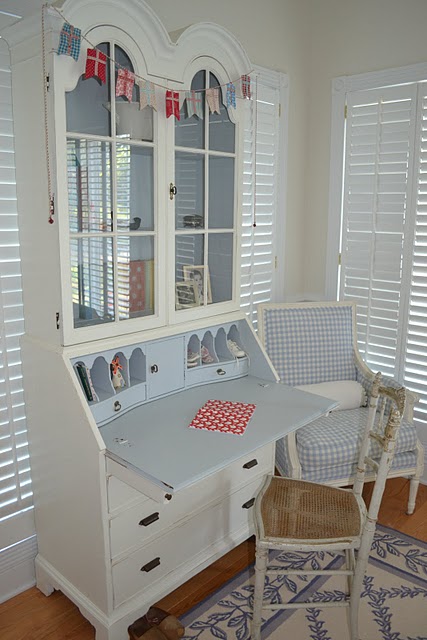
I found a beautiful secretary desk on craigslist for only $375 and I think she is gorgeous, picture and details coming soon! All of my stationary, design/decor and artsy/craftsy project components will be completely housed in it. The only exception is my painting supplies, which I still have to figure out. Canvases and my portfolio are rather large.

I wanted to strip wallpaper, add board and batten with shaker pegs, replace light switches and lighting... however, after she fell out of the crib everything got fast-tracked. The library is now an empty room with a bed in it, the walls are still wallpapered and the lighting is still dated, as are the switches. I'm totally in love with her bed, though it is 3 inches wider than a standard twin? Not sure what that is supposed to be.  So hubby bought wood to cut slats, and we've made it work.

The wallpaper stripping, painting, board and batten and shaker pegs will just have to wait for a little later. I've spent the last few days organizing and PURGING. I think I've shrunk my office items by 50%. I got realistic about my scrapbooking, or rather lack thereof, a few months ago and gave most of my supplies to a friend of mine that actually scrapbooks and makes cards.  Well I found another stash for her, so I'll bring them to her this week.

I have a small yarn stash which I may have to get real about too. I was crocheting a bit before Kirsten was born, making booties and hats and scarves. I haven't touched any of it since then. If I don't touch it at all in the next 6 months, it needs to be donated to someone who will use it, like my aunt.  I've set a calendar reminder for December 31, 2012.

I have a decent number of blank stationary and thank you's, so I'm not permitted to buy more until what I have is used up (a year or two).  I have a bit of a pretty paper addiction. I want to be the sort of person who sits down and writes lovely notes to various friends and family members. But let's be real, if I have something to say, I will call or email or Facebook or think about calling or emailing or Facebooking (totally a word), but don't get around to it often enough. The days of beautiful penmanship on an envelope coming in the mail are mostly in the past. I've allowed my penmanship to get sloppy, more of a scrawl halfway between writing and printing with a few made up letterforms that hang on from when I was in middle school and expressing my creativity.

So, it's been a crazy week, but I've taken lots of pictures and I have a lot of little projects in the works to share. Not to mention the rest of the posts from Iceland.

Do You Love Blue Ceilings Too?

Having lived all over the country, the world even, you'd think my style would be a little more eclectic than it is. Perhaps it is a bit. While lots of bloggers seem focused on mid-century modern, my style is far more traditional, with a little Swedish country/Gustavian thrown in to the informal areas of my home. Of all the areas I've lived in, the one that has most influenced my style would be the South; Charleston, SC to be even more precise. The charming relaxed elegance of historic southern homes, with their wraparound porches and approachable friendly dining areas. Homes that made you feel like you were welcome to come and sit a spell, whether at a formal dinner or a casual Tuesday evening on the porch with a glass of sweet tea. Something about the wrap around porches in the south and the heady smell of magnolias has me lost in ideas of gentility and grace.

One thing prevalent in the south is a lovely blue ceiling on the porches, alas I have no porch to paint the ceiling a lovely shade of "haint blue". Haints are the restless spirits of those who have passed, but not moved on. It is said that the spirits can't cross water, so painting the ceiling of your porch blue was said to prevent haints from crossing your porch to come in your door. I generally paint ceilings in my house "Polar White" by Valspar, it's a lovely creamy white. However, I am going to paint my master bedroom ceiling blue, I'm leaning towards a softer blue with a hint of grey ("Grey Mist" by Valspar, might cut it about 50-75%). My hubby thinks I'm crazy, but I think he'll love it when it's done. I hope anyway.

via

via

via

via

via

via

via

via

via
This master bedroom feels absolutely serene, I would love falling asleep in it every night. I'd like a wraparound porch and this master bedroom please.


New Desk for a New Office Nook

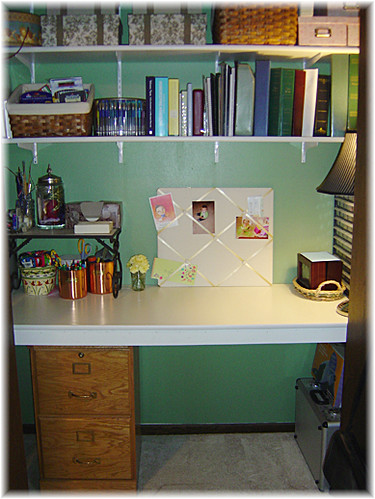
Having my library/office converted into a big girl room for Kirsten means I need to create a new office nook quickly. Having it in the closet was perfect, because when I was in the middle of projects I could close the door on the mess. Now I'm going to be pulling my desk/office area into a public area of the house and will have to keep it neat. I have a spot for it, but I have no furniture for it. The beauty of the closet was I put a laminated board up on 1x2's screwed into the studs of the closet wall and voila desktop and super cheap too! Now, I need a physical piece of furniture and I don't have months to leisurely peruse antique stores and auction sales and yard sales until I find the perfect piece.

I love the look of this desk, but I need storage or it'll just become one big hot spot for papers and odds and ends.


This one is pretty too, but it has the same issues, and I won't have a room to put additional storage. It will have to be somewhat self-contained.


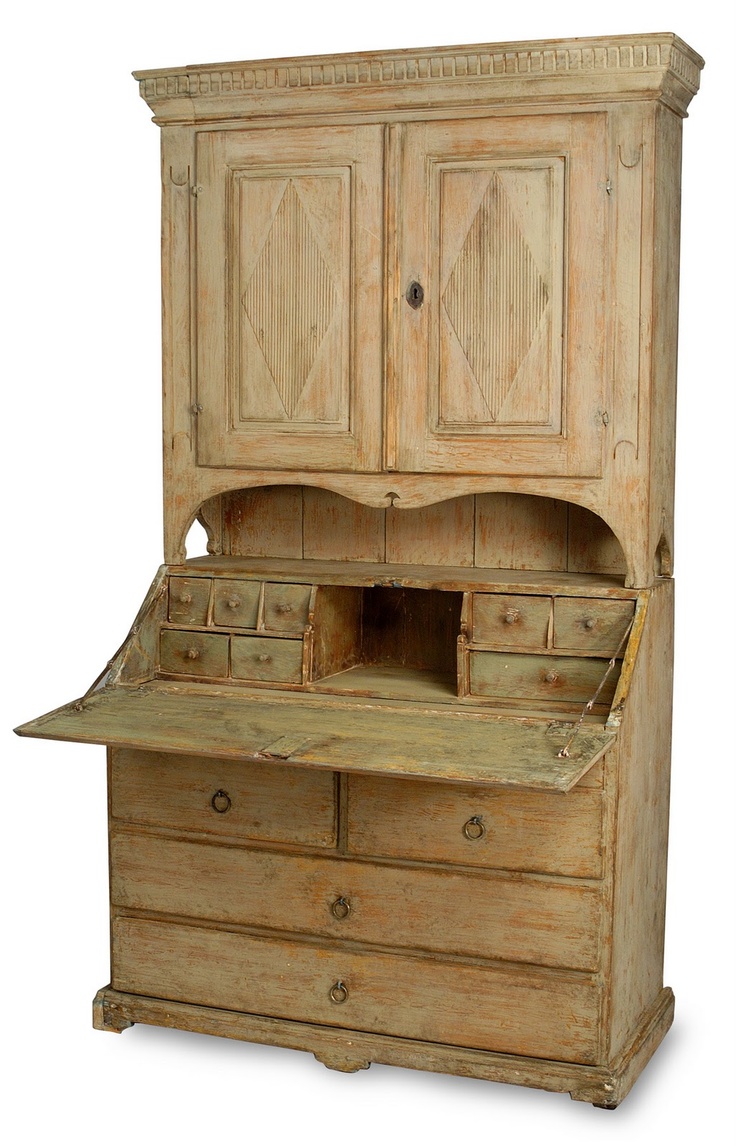
I'm looking for a secretary or a roll-top, something that I can close on tiny messes, if not larger ones.  I've been lusting after Swedish secretary desks for a while now, little did I know I should have been actively searching.


My mother has a gorgeous Danish midcentury secretary that I used to use as my desk in high school.  I loved that desk!  It had a little door and a top drawer that I could LOCK!  Isn't that a dream come true for every teenage girl with a diary, teenager girl with younger sibling, or just every teenage girl???

Big Girl Room Planning

My daughter, Kirsten, just turned 2 this weekend, so now that I'm done with her party I'm starting on the next big project. I'd really like to get her mostly potty trained before going to Iceland in a month, but I need to get her into a big girl bed so she can get up when she wakes up to go potty. At least, I think that is how it works. So, even if her room isn't even close to ready I really need to get her into her big girl bed.  I have a lot of ideas and inspiration also pinned on a Pinterest board just for her room, if you want to take a peek.

Ok, so for posterity, here is the before... the closet, aka my office:

Desk Organization

And the room itself, note the seemingly tight crop... it's just because the room is small and there is no way to stand back far enough to get more of the room in the shot!  I'm actually standing in the closet for this picture. So, no pictures of the wallpaper, but I'll take some before pictures after we pull out all the bookcases.  The carpet is very light cream and while not the best choice for a toddler's room, it'll stay for a few years until we put hardwood down throughout the house.

Library

k, so here is the plan, though the rugs will probably all go except for the one under the table and chairs:
Image sources from top right: Bump Bed; Canopy; Side Table;
Doily LampToy Box; Table and Chairs from bestpricetoys.com; Bookshelves;
Shaker PegsBoard and Batten; Fairy Lights

We'll be turning the library/office into her big girl room.  The last step of the transformation will be replacing the door in the upper right corner with a hidden bookcase door that swings out into the family room, like the first three on my hidden door post. I envision putting face front book ledges on that door facing into her room for her to use, but I need to keep the door light enough for her to push open.  This will increase the usability of that corner slightly.  Currently the door is a glass paned door which lets a lot of light in that room; great for the day, terrible for summer nights. So, I'll have to think of something there. Suggestions?

via

Starting in the upper right corner, the bed is a photoshopped image of a toddler Bump Bed, I wanted the sleigh headboard area and Swedish footboard area and hubby was going to build it for me.  After awhile I got a little more realistic about what our time would allow and found a sweet rosemaled single bed from a seller on Etsy. She was great to work with and I highly recommend her if you love rosemaling.

This is actually the sellers photo, but I don't think she'll mind me using it to share.

Since the single bed is a bit longer than I was planning for, I may have to make adjustments for where I have the bookcase and canopy area, which brings me to the next picture. I really wanted to make her a round canopy with a hula hoop, white fabric, and white twinkle lights. I imagine it with a big pillow on the floor for us to snuggle in to read.

I'd like a small round bedside table for her, ideally with a little storage like the table in the lower right corner.

I have a whole bunch of white/cream doilies from my hubby's grandmother, that no one else wanted.  After I saw the doily lamp I thought that would be a sweet idea for them above the little table and chairs.

I'd like some enclosed toy storage, though I'm leaning more towards a closed cupboard with baskets now instead of a toy box. A small table and chairs on the one wall for coloring or tea parties; we already have two chairs just need a table.

For the bookshelf at the end of her bed, hubby is going to build it for me.  I'd like the top three shelves to be open to both sides with the back running down the middle, like two shallow bookcases back to back. Towards her bed I'm thinking of room for some bed time books and stuffed animals, nothing heavy. The bottom of the bookshelf would have deeper shelves opened to her reading nook with room for bigger heavier books and toys. The side of the bookshelf facing the room I'd like lined in cork for pinning up pictures and artwork.

Currently the whole room is wallpapered in a baby blue background with large cream magnolias!!!  It is pretty wallpaper, but not what I want for her room. So, I will be tearing it down and putting up board and batten.  Everywhere you look people are putting up board and batten, I know. Hers won't be white though, we'll do oak board and batten and I'll use the lightest stain (natural?) so it'll match the woodwork in the rest of the house. I also want to put shaker pegs right under the rail along the wall by the table and chairs. She can hang up her apron or a sweater or whatever that way. Ideally, the one closest to her closet will hold the outfit for the day that she'll pick out the night before.

We'll be installing a full closet organizing system in that closet like we did in the nursery and the master closet. I LOVE a good organized closet and it eliminates the need for a dresser!

I'm not even going to think about paint color until I see what tones we'll end up with in the board and batten and how the rest of the room comes together. I want to find all the furniture first, figure out what I can paint and what I have to "live with". I want the room to feel calm and peaceful, so I'll figure out what I have to "marry" with paint, then go from there. I will tell you though that the ceiling will be getting a soft blue gray paint definitely and will be stripped of it's texture. I painted the green in the closet, I pulled it from the darkest green in the magnolia leaves on the wallpaper.  Green is my favorite color, but I wouldn't use it elsewhere in the house (it just wouldn't coordinate well).  It's a fairly dark green, so covering it up with primer will be oodles of fun, I'm sure!

I want the room to have a very light feel to it, since it is so small. So, except for the bed I want the furniture and the bedding to all be very light. She'll be using the down comforter and pillow from Iceland that I had as a little girl and I have several sets, some hand embroidered, for her to use. I can't wait!

So, I have a bunch of spring projects, plus this bedroom to get working on. The three closets can get their coat of paint and shelving added at the same time as we are doing her closet system. The garage might get pushed off to the end of the month... oh wait, it is almost the end of the month. Hmmmmm... May? This is going to be a BUSY summer!

Farewell Domino

D
omino's last issue will be released this March, April will be a disappointing month for many. It is joining several other home decor magazines that shuttered their doors in 2008: Meredith's Country Home, Time Inc.'s Cottage Living, Hearst's O at Home, Martha Stewart Living Omnipedia's BluePrint and Conde Nast's House & Garden. The website will be shuttered as well, so I'll have to go save anything I had marked as a favorite before it's gone for good. Which magazine is next?


Touches of Christmas

B
efore 2009 gets into full swing, I want to spend this weekend finishing up some Christmas posts and recapping 2008.

Just a few Christmas touches around my house. The more Scandinavian elements are in my family room, dinette and kitchen areas (informal), and the others are in my living room and dining room (formal areas).

Swedish Straw Christmas Goat

Scandinavian Christmas Garland

Christmas Nisse
Christmas Nisse

Nisse Cube
Nisse Cube

Copper Fruit Candles

Christmas Cutout Sled
Christmas Sled

Hurricanes
Christmas Hurricane

Christmas Hurricane

Jul Ball
Jul Ball

The Reason for the Season
Christmas Manger