Showing posts with label Organization. Show all posts

Spring Cleaning

I'm so over winter and ready for spring. It's still quite cold here, and we're still bundling up in wool and snow suits with plenty of snow on the ground. Yet, we're opening the windows a bit during the day to air out the house. I'm tired of the stuffiness of a house shut up for winter. I'm ready to do a declutter, purge, and thorough spring cleaning! Care to join me?

Spring Cleaning at Candy Hearts and Paper Flowers


I usually spend a week purging, a week deep cleaning, a week organizing and a week on the miscellaneous repairs or special projects. I divide the house up into zones to tackle on each day, and always give myself a day off each week to take a break and enjoy. This month I am also planning a birthday party for my daughter on the 13th, so I need to leave myself enough time to get that done.

I'll be deep cleaning the entire house, however these are the areas that I plan on concentrating on this year that I know need a little extra help.

For purging: closets, linens, my drawers, and the kitchen.
For cleaning: electronics, the stove, doors & windows, soft furnishings & textiles, registers & grates
For organizing: miscellaneous drawer, pantry, bathroom closets, front hall closet, garage (tall order)
Special project: create a guest room/craft room out the bedroom in the basement and finish the bathroom in the basement

My zones this spring (I'm going from least amount of work to be done to most):
Monday: Bathrooms
Tuesday: Dining Room(s) (formal/casual/kitchen dining rooms)
Wednesday: Living Room(s) (living/family/game/rec rooms)
Thursday: Bedrooms
Friday: Other Room(s) (hall closets, foyers, mud room, laundry room)
Saturday: Kitchen
Sunday: Family Fun Day!

If you'd like to jump around and do your own thing, but are looking for some sort of guide, check out the September ShapeUp Guide from a few years ago. I do a bit of a mini "spring cleaning" in the fall as well to get ready for the holidays and get all the summer bits put away and pull out all the cozier things we need for fall and winter here. Otherwise, join along here and on Facebook.


Bookshelf - Done

Ever read the blogs of other bloggers and they show you gorgeous rooms that they transformed in a weekend? Layla of The Lettered Cottage is a great example of this, or Jessica of Four Generations, 1 Roof. I'm most definitely NOT a good example of this! I've been working on my daughter's big girl room, slowly but surely for over 6 months now.

 The back is a light pink, but can easily be changed over the years.
I really need a wide angle lens to get better pictures of her room.
 And the light that finally allowed me to get some pictures that weren't grainy or dark!
 It's the Pink Alyssa Chandelier from Pottery Barn.


Want a peek of the old light? It had a single bulb in it and the room was terribly dark for pictures.


First, she moved in to an empty room with just a bed
Then I painted some shelves and added some knick knack's and a couple of pictures.
Then I refurbished 2 chairs and a rocking chair
Then I cleared out her closet and brought in about half of her clothes
Then DH built a bookshelf for her and I painted it and filled it with books and toys and her menagerie of stuffed animals.  She promptly emptied the stuffed animals back into her bed.

Remaining list to be completed:
Tablecloth for her table
6 picture frames to be built
Bedside table to be built - wait until you see what I have in store for this!
Toy box to be built
Closet to be gutted and redone (I was using it as an office/desk area)
When we are ready to put new flooring in the house we'll rip out the wallpaper and put up board and batten and shaker pegs

Bye Bye Library

Rosemaling Bed in Kirsten's Big Girl Room

So, last Thursday evening my daughter climbed up the side of her crib and fell out with a big thud. Her crib is fairly deep, deeper than average, it was one of the reasons I was smitten with her round crib. I've been planning to move her in to a big girl bed for potty training for a little while now, but first we had to clear room in the basement to move all of the bookcases out of my library/office. I also needed a new home for my office which was previously occupying the closet of the library.

I found a beautiful secretary desk on craigslist for only $375 and I think she is gorgeous, picture and details coming soon! All of my stationary, design/decor and artsy/craftsy project components will be completely housed in it. The only exception is my painting supplies, which I still have to figure out. Canvases and my portfolio are rather large.

I wanted to strip wallpaper, add board and batten with shaker pegs, replace light switches and lighting... however, after she fell out of the crib everything got fast-tracked. The library is now an empty room with a bed in it, the walls are still wallpapered and the lighting is still dated, as are the switches. I'm totally in love with her bed, though it is 3 inches wider than a standard twin? Not sure what that is supposed to be.  So hubby bought wood to cut slats, and we've made it work.

The wallpaper stripping, painting, board and batten and shaker pegs will just have to wait for a little later. I've spent the last few days organizing and PURGING. I think I've shrunk my office items by 50%. I got realistic about my scrapbooking, or rather lack thereof, a few months ago and gave most of my supplies to a friend of mine that actually scrapbooks and makes cards.  Well I found another stash for her, so I'll bring them to her this week.

I have a small yarn stash which I may have to get real about too. I was crocheting a bit before Kirsten was born, making booties and hats and scarves. I haven't touched any of it since then. If I don't touch it at all in the next 6 months, it needs to be donated to someone who will use it, like my aunt.  I've set a calendar reminder for December 31, 2012.

I have a decent number of blank stationary and thank you's, so I'm not permitted to buy more until what I have is used up (a year or two).  I have a bit of a pretty paper addiction. I want to be the sort of person who sits down and writes lovely notes to various friends and family members. But let's be real, if I have something to say, I will call or email or Facebook or think about calling or emailing or Facebooking (totally a word), but don't get around to it often enough. The days of beautiful penmanship on an envelope coming in the mail are mostly in the past. I've allowed my penmanship to get sloppy, more of a scrawl halfway between writing and printing with a few made up letterforms that hang on from when I was in middle school and expressing my creativity.

So, it's been a crazy week, but I've taken lots of pictures and I have a lot of little projects in the works to share. Not to mention the rest of the posts from Iceland.

Taking Care of the Little Things

It's been a busy and interesting week, I spent last night setting up a Facebook page for the blog. I know quite a few people like to track their blogs through Facebook these days instead of traditional readers.

Like Candy Hearts and Paper Flowers on Facebook... Pretty please.

Kirsten LOVES to push the buttons on the front of the dishwasher, and we usually keep it slightly ajar so she doesn't start it accidentally. So she was pushing buttons and somehow turned on the child lock. Child lock... brilliant! Except I had no idea how to turn it on or off, so I got to spend some time the other night trying to figure out how to turn the child lock off. Bonus to this though is I now know how to turn it on!

After I went through the two closets, I spent some time this week taking care of a few little things and spots around my house that have been driving me crazy for a while. It's funny how many times I'll look at something and it'll bother me, but I think I don't have time to take care of it right that moment. It turns out some of these things took me less than 5 minutes to deal with from start to finish. LESS THAN 5 MINUTES??? Why, oh why, didn't I take care of them sooner? They're minor, trivial things, but it's still nice to get them done. A dear bloggy friend of mine, Susan, wrote about this very thing this week. I wonder if there is something in the air, or perhaps the season? I read her post and knew EXACTLY how she felt. I feel a little less stuck today though, than I did on Monday. Hopefully I can keep going for a while, I still have a few BIG projects to accomplish this spring.


Getting the little things off my mental list felt as good as getting the big things done. So if you have 5 minutes, maybe tackle the small pile of papers, or the phone dumping ground, or the little table in the entry or the pile of shoes, or whatever little thing has been bugging you for a while. When you are done, come back and share a cup of coffee with me... we'll chat a while.

Packing - Trip Planning

I am going to Iceland this summer for about a week and a half. I've made two trips in the last three years where I didn't follow my normal routine for packing and trip planning and it showed. I usually make a list of things I will need and I mark them off as I'm packing them both departing and returning, so I know I'm bringing everything home with me. Usually I'm gone for a week or more, so I tend to bring more stuff, so the list really helps.

via
First, I went to Minneapolis to visit with Kiy and would only be gone 2 nights, and needed a minimum of clothing/accessories. So, no list. As a result I forgot something, and had to pay to have it shipped back to me. If it was a tube of toothpaste or something along the disposable lines, no problem, but in this case it was my down pillow I got in Iceland. I couldn't just replace it at my local Target. I'm not saying write down a precise description of everything; 3 - shirts, 3 - jeans, 1 - pillow would have sufficed in this case.

The second trip was two years ago when my daughter was born, can you believe I forgot to bring the camera???? I had taken it into the nursery to take pictures since we were finishing up a few last minute things when we got the call that she was on her way. We had an hour to put things away, grab our stuff, run the dogs to my brother-in-law's and head out of town. Halfway there I flashed on an image of the camera sitting on the shelf in the nursery where I left it and almost started to cry. Hubby said "We'll just buy a new camera" which we did as soon as we got to town. The new camera wasn't as nice as the one we had, but it got us through her first three days. Forgetting the camera was COMPLETELY avoidable if I had ran through a quick list.

Now with a little one to pack for as well, lists are more important for me than ever. I can't imagine the crying and hysterics I would endure if I forgot her beloved blanket or Pooh somewhere. It's bad enough when her blanket is in the washing machine. Thankfully, I don't have to cart around near as much as when she was a baby, but trying to carefully plan for what she'll need for 8 days in Iceland is going to be difficult. I'm actually in full potty training mode just so I can hopefully eliminate a large number of diapers and wipes and all that that entails from the list. She'll be quickly thrust into a "big girl" world like real tableware and no crib. I'll try to prepare her a bit over this month.

via


I also picked up a Trunki for her from zulily or OpenSky for more than 50%, I can't remember which.  I'm thinking it was OpenSky though the more I think about it.  She loves riding around on it and calls it her car.  I'm hoping getting used to it and then having it packed full of special things for her trip will make everything go smoothly.  Well, as smoothly as one can hope for with a 2-year old!

Do you have any tips for traveling with a toddler? I'll be compiling a list of what I am doing for a post in a couple of weeks, I'd love to feature your tips as well!


Spring Cleaning Projects Update

Remember this post?  Well I have 2 projects done, and realize that things take a lot longer to do with a toddler.

  • Front Hall Closet - I'd love to add shelves to add some pantry space for a few things we buy in bulk
  • Back Hall Closet - Needs a better shoe storage solution than kick them off onto the floor of the closet
  • Game/Sewing Closet - Wow, just a big mess right now
  • Garage - Gardening/Storage Side - just needs cleaning and organizing
  • Garage - Tool/Workshop Side - needs better storage
  • Garage - Front End - this should be cleared out completely

Ok, so the front hall closet didn't get pantry space, mainly because we have a little tv issue which still needs to be dealt with at some point.  I did move my sewing items into that closet freeing up room in the game closet for some toy rotation bins and my office stuff that I have to move out of the library (which is becoming Kirsten's big girl room). I'm currently looking for a secretary desk, but until then I need a place to store all the photo albums and few remaining craft supplies I kept after a big purge last fall.

Anyway, before and after's are in order!  I can't believe how messy these two closets got!  I haven't reorganized them in about 5 years and it showed!  It was hard to get good pictures of the game closet, since it's in a hallway, even with a wide angle lens.


This is the messy game closet

Hubby installed 2 ft deep shelving every 8"
The top 2 shelves on both sides will be 1 ft deep
to give better access to those items
Just what the closet needed and now there is plenty
of room for my office items and toy bins in the bottom
The baskets hold smaller card games, dice, cribbage
board, marbles, dominoes, etc

We also painted the closet before putting the shelves in
So we have a lovely bit of soft blue peeking through from the back

The disaster of a front hall closet.
I know, I know... I'm hanging my head in shame
So much purging to be done here

We moved the shelves that were holding the games into this closet
All of the holiday items in bags on hanger got moved into bins with
the rest of the holiday items in the basement where they belonged!
I used to just shove all the extra grocery bags into a bag and hang it.
Now they are neatly shoved into those two wipes containers on the
shelf, once they are full the rest will be pitched from now on.

Now there is room for my sewing/embroidery items and the VACUUM.
I'm extremely happy it doesn't have to be tucked into my closet anymore!
I'm almost embarrassed to post these, but I'm soooooo very happy with the after in both of them.  The little shelf on the right hand side about halfway up the height of the closet holds the tv, which limited what I could do in this closet a bit.  The tv faces out into the dinette area, I guess the previous owners watched tv while eating.  We don't watch tv or even answer the phone during dinner, so we have yet to turn it on and we've lived in the house for 8 years.

Spring Cleaning Motivation

It's been approximately 8 years since we moved into this house. This is the longest I've ever lived in one house, I believe the previous record was approximately 3.5 years give or take a couple of months. Spring cleaning has always been fairly easy for me as a result, I mean things hadn't had a chance to accumulate without getting a good purge due to moving. In this house though, the closets are starting to bulge a bit. I finally had enough of the catch-all drawer in the kitchen, it had been three years since I had last cleaned it out and it was worse than last time, significantly so. It was great for about two and a half years or so, then thanks to a mad dash clean up before last Thanksgiving a bunch of stuff had been shoved into it. Well as most of us know clutter breeds more clutter, when we couldn't get to the organized containers below more things got dropped in anywhere it would fit until it was a disaster. So, I finally broke down and purged it again, no pictures this time though.

I have three hall closets in similar states of clutter breeding catastrophe, and a basement and garage that I really need to go through.

The closets really need to have everything pulled out, walls painted, organizing shelves and possibly rods put in... depending on the closet. For some accountability, I'm going to do a public to-do list and share before and after pictures as I go.  I'll break the garage into sections and the basement into sections, otherwise they'll just sit on the list until close to the end of the month.


  • Front Hall Closet - I'd love to add shelves to add some pantry space for a few things we buy in bulk
  • Back Hall Closet - Needs a better shoe storage solution than kick them off onto the floor of the closet
  • Game/Sewing Closet - Wow, just a big mess right now
  • Garage - Gardening/Storage Side - just needs cleaning and organizing
  • Garage - Tool/Workshop Side - needs better storage
  • Garage - Front End - this should be cleared out completely

Actually, realistically this is going to take all month, so I'll probably have to do the basement in May.  Just in case I can start it earlier though, I'll break it down

  • Laundry Room - needs organizing and cleaning
  • Utility/Storage Room - needs organizing and cleaning
  • Rec Room Area - needs serious purging, organizing and cleaning
  • Paul's Den - needs organizing and cleaning
  • Bathroom - Drywall prep, painting, molding, vanity and toilet installed
  • Storage Closet - purging and organizing, maybe install shelving

Are you spring cleaning at all? What projects are you working on?

Grocery Shopping

I'm always looking for ways to make the necessary tasks in life easier... laundry, cleaning, filing, grocery shopping... We all have to do it, unless you happen to have a live-in maid. Since I just went grocery shopping I happen to have one fresh in my mind. Hubby and I started using a free app for GrocerySmart.net about 4-5 months ago. It's currently available for both Droid and iPhone.

Directly from their website:
"Say goodbye to the wad of paper...
...and hello to the easiest to use, fastest, and most convenient new way to keep track of your shopping list. With the FREE GrocerySmart service you can easily:
Sync multiple grocery lists between the website and your mobile
Share your list easily in realtime with your family members or friends
Access our inventory of thousands of grocery items, or add your own
And it's free!!!"

The nice thing about the app is if hubby is picking things up for me at the grocery store and I just happen to remember 4 more things I forgot, I can add them from my app or computer and as long as he syncs before leaving the store they show up right in his list. No more calling to add extra items to the list. I maintain 6 lists: Target, Hugo's (grocery store), pharmacy, Sam's club, L & M Meats (our local Butcher) and the liquor store. If we happen to be at or near any of them we can just check the list to see if there is anything we should pick up. We always sync again before getting into the checkout line to see if anything new has been added. There is a spot on each list for notes, so I'll sometimes put what meals I have planned in there and I'll pick up side dish items to go with them based on what is on sale.  Also, the app stores your loyalty card information for each store and also has a bar code for the clerk to scan.


If you hover over an item and click details, you can add a description which will show up in small font under the item to purchase on the phone app.  This definitely helps if you want something very specific and it's not something you purchase often.  My list above is pretty empty since we just went grocery shopping two nights ago, but it will give you an idea.  On the app itself, you just check off an item as you purchase it.  If you are prone to accidentally clicking on items (sensitive phone setting or what have you) I'd just double-check the items marked off before leaving the store (Show All).


I like it because the interface is uncluttered and easy to use. The only thing that would be a nice addition is the ability to have a personalized master list, that you can add things to your list from.  This isn't a huge deal because an auto complete list pops up as you are adding items to your list.  I hope someone finds this useful, it's made our lives a lot easier.  Also, now we both always have the list with us at all times, so if one of us happens to have extra time to run by the grocery store on the way home we can and don't have to worry about not having the list.


Permanent Organizing Solutions

I
may not be the best person to write this post, because I don't have a single drawer that has fully transitioned to permanent organization solutions. If my make-shift solutions work, I don't change them. As much as I drool over gorgeously organized all matching solutions on HGTV or in magazines, I also think a lot of the items are ridiculously expensive and would rather spend my money traveling or just save it. However, if you do indeed implement a solution like cereal boxes, you will want something more permanent eventually.

I have quite a few white plastic trays by Rubbermaid that I've used in various kitchen drawers for years. I like them because it doesn't matter what size drawer they end up in I can make them work. That's not always the case if you go with an all in one tray type solution.

Your solution should be able to:
Change, grow and evolve as your needs do.
Be cleaned easily.
Work for you, it should make your life easier, not just add to existing clutter.

You can see one of the plastic modular trays that I use in this picture right at the end of the flatware tray:
Junk Drawer Organized

I use several of these trays in each drawer throughout my kitchen, bathroom and office. If you need a lot of small containers for things like safety pins, coins, buttons, erasers, matches, stamps, etc. consider tackle box organizers. I know it sounds strange, but I use a tackle box for my first aid kit, because I can have any configuration of tiny spots for band-aid's, gauze, tape, etc. The lids can be removed so it can sit open in a drawer, or you can leave the lids on, but it's an extra step to open them and annoying if you have to get into it quite often.

This tackle utility box is just $6 and you can see there are a lot of slots for dividers to slide into, so you can customize the fit your need quite easily. Don't limit yourself to a container/home goods type store when looking for permanent solutious, you'll usually find cheaper solutions at your local hardware and sporting goods stores.


If you are curious, our first aid kit is similar to this 4-drawer tackle box.

Read the whole series!
Monday: Using what you have to organize
Tuesday: My current areas organized this way
Wednesday: Pick a new area to organize - Drawers
Thursday: Laying it all out and putting it away


Organizing My Junk Drawer

Y
esterday I said I didn't think it was that bad, well it was worse than I thought!

A while back there was a project of sorts about truth in blogging started by Sweetney I believe. People were posting pictures of themselves first thing in the morning, just out of bed, before make up or showers or any primping at all. For a blog like mine, as we discuss and share homemaking and organizing and decorating this is my little bit of truth in blogging. I've never pretended to be perfect though. On my about page, I'm perfectly honest, "I'm not quite there, but I want to get there and I'll share the journey with you." So, here we go:

Before, after I lifted the top layer of papers, which consisted of recipes, so you could see the meat of it all:
Junk Drawer Before

Everything that did not belong and had to be put away elsewhere in the house:
Junk Drawer Put Away
That's a lot, I was surprised to see that much stuff was misplaced. Plus, I'll be needing those garden trimmers soon, so this was good timing.

A clean empty drawer, notice the bottom is lined with shelf liner. I do this so it's easy to wipe down and the drawer doesn't get ruined if a pen leaks or explodes. All of my drawers are lined with shelf liner or drawer liner. When clothes are involved it helps prevent snags, for those drawers I use lightly lavendar scented paper drawer liner. You can see that paper under the bits in my vanity drawer. I just adore it! I bought two boxes with a $50 gift certificate to Crabtree & Evelyn I had gotten for Christmas two years ago from my grandmother. After I cut the sheets to size I cut the remaining edges into squares and tucked them into purses and shoes and anywhere that could use a little touch of freshness.
Junk Drawer Empty

I mentioned having an extra flatware tray that I use for that drawer, but I wanted to share what I would do if I didn't have that tray. So, if I just wanted temporary containers while I was working out what I would need in the drawer long term, this is what I would do. The small glasses are a little bigger than shot glass size and one is cracked, so we don't usually use them as a set, so this is perfect. The long narrow boxes are cut from cereal boxes, two tops and two bottoms. You can't quite see it, but down the far right side I have a pair of scissors and a ruler, they don't fit in the box. So, for permanent solutions I know I would need at least one longer tray, or a bigger cereal box. I cut dividers for the small white tray in the lower left out of the same cereal boxes, to separate out the matches, stamps, lens wipes, gift cards and USB thumb drive. The coins are separated into four small black box tops. Eventually, a box outside of the junk drawer would be ideal for the batteries, or a set of rechargable batteries with a charger would be nice. The heart tin holds seed packets and cut flower food, this could obviously use a better solution.

Junk Drawer Organized With Temp Containers

Finally, this isn't what I would call permanent, since there are still areas that can improve, but this is with my flatware tray in place. You'll see it actually works quite well since there is one very long spot for my ruler and scissors. It's almost like I could have picked this out to replace the four box tops/bottoms with the additional long section need fulfilled. This is how it will stay for a little while at least.
Junk Drawer Organized

Ok, so if you organized anything, anything at all this week and want to share your before and after, link up! Please link directly to the post and not to your home page, so we can find the appropriate post easily:


Read the whole series!
Monday: Using what you have to organize
Tuesday: My current areas organized this way
Wednesday: Pick a new area to organize - Drawers
Friday: Transitioning to permanent organizing solutions


Organizing Your Drawers

A
lmost everyone has a "junk" drawer in their kitchen. So that's what I'll tackle today and tomorrow, the information applies to any type of drawer, whether it's full of clothes, kitchen gadgets or miscellaneous tidbits.

Photo from Woman's Day

Let's be realistic about this photo, do you think they found an organizer that happened to have all the perfect spots for their junk drawer? No, they found the perfect sized stuff for the container, that's why I wouldn't advocate rushing out and buying something like this.  Everyone's stuff is different, find out what you need first, then buy accordingly. 

Our junk drawers are not really full of junk, but all the miscellaneous bits and pieces that you are forever needing close at hand. Junk has such a negative connotation, surely there are better names for it. Regardless of what you call it, it seems to be the drawer that is least likely to stay organized. If you are like me, you are in and out of it at least 5 times a day, now multiply that by the number of people in your family (tots and babies excluded of course). The drawer gets a lot of use and things are constantly going in and coming out. The only way to keep it neat is to have a place for everything, otherwise everything just gets dropped in and you are forever searching for tidbits. Have you ever heard yourself saying to a family member: "I know it's in there, look harder."

I had an e-mail regarding my vanity drawer asking me if it really looks like that or did I straighten it for the photo. I didn't straighten it, it really does always look like that. However, my junk drawer while mostly organized would definitely need a straightening for a photo, the last straightening was done about 2 years ago. I actually don't think it's that bad for 2 years.

Organizing a Drawer

  1. Determine what's currently in the drawer and what needs to be in the drawer that might be elsewhere currently.
  2. Gather all the items together and sort and purge, ask yourself:
    • In some cases, what is it?
    • Do I really use or need it?
    • Is there a better place in the house for it?
  3. Separate them out to determine what your storage containers need to look like: how many and what sizes
  4. Gather up storage containers that you can use, remember I'm not advocating buying anything yet!
  5. Sort items into their containers and arrange the containers in the drawer
  6. Live with it for a while, rearrange and adjust as you add additional items or move things to other homes. This isn't possible if you run out and buy a drawer organizer right away.
  7. Consider transitioning to a permanent solution

My Junk Drawer

A few "office supplies": pens, pencils, scissors, tape, post-it's, markers, paper clips, rubber bands, etc
A few band-aid's (we have a separate first aid kit)
Matches and a long lighter for the grill
Batteries
Bag Clips
Gift Cards
Coins
Miscellaneous screws and furniture parts
Miscellaneous receipts and papers
Phone book
Coupon book

Given what I have above I need a lot of small boxes, a couple long narrow boxes and a big empty space for the phone book, papers (if they even need to stay) and coupon book. I currently use an old flatware tray in that drawer, the previous owners left theirs so I moved it over there. But I'll try to organize it with other things from around the house, the way I would if I was starting from scratch.

If you want to organize your junk drawer with me, take about 5 minutes today and gather the things that belong in your junk drawer that aren't there currently. Also, measure the depth, width and length of your drawer tonight, so you'll can find or make containers that fit your drawer. I'll include a Mr. Linky tomorrow so we can share our before and after's.

I'd like to know what else you store in your junk drawer, so tomorrow when I lay it all out and put it away, I'll be sure to have a better representation of what most families would have. Especially speak up if you have small kids, I'm sure I'm missing the little things that would come with having kids in the house 24/7.

Read the whole series!
Monday: Using what you have to organize
Tuesday: My current areas organized this way
Thursday: Laying it all out and putting it away
Friday: Transitioning to permanent organizing solutions


Using What I Have to Organize

H
ere are a few scenarios to illustrate what I mean about using what I have:

The first is an example of my vanity drawers, I don't use a jewlery box, but I have a vanity with very shallow drawers for the top 4, which works will for jewelry, safety pins, make up, and small hair accessories. To compartmentalize I use a variety of box tops and jewelry boxes, cut to size if needed. They work perfectly since lids are by default shallow. I've collected all of mine over the years, but if you let friends and family know you'd like them, I'm sure you'll have plenty in no time.

Vanity Drawer

Silver service holding my cotton balls and swabs, a bud vase holding my make-up brushes. Please excuse the white dishcloth background and reflection, silver catches everything and my bright pink shirt was terribly distracting, from both the front and mirror behind.

Silver and Brushes

The olive oil cruet I use for my dish soap on the counter, handy but not big and ugly.

Cruet - Dish Soap

A flowerpot holding decorative scissors in my office. (The scissors aren't decorative, the cuts they make are.)

Scissors

A corner of my desk, a stone kitchen shelf providing extra storage, a canning jar holding paint brushes in the far left corner, and copper flour and sugar containers holding pens, pencils and scrapbooking punches.
Containers

Just a small sampling of rooms in my home using what I have to organize the little bits that I need. We all have the little things that we need, but so easily get lost in a drawer amidst all the other little bits and pieces of life. Keeping them separated and having a spot for every little thing, even if it's just a little spot helps keep everything under control.

Have any suggestions for the spot to organize tomorrow? If not, I'm leaning towards the "junk drawer" that we all have in our kitchens. Mine could use a little reworking, but I'm open to other areas if anyone has any preferences.

Read the whole series!
Monday: Using what you have to organize
Wednesday: Pick a new area to organize - Drawers
Thursday: Laying it all out and putting it away
Friday: Transitioning to permanent organizing solutions


Using What You Have To Organize

W
hen I asked for suggestions as to what you'd like to see more of one of the requests was more organizing tips. At first I was a little reluctant to share what I do, because it's sort of a hodge-podge. However, with the economy being what it is, I'm hoping more of you are looking for solutions like mine. I don't go out and buy drawer dividers and organizers. I use what I have on hand. I do have a place for everything, everything isn't always in it's place, but it is most of the time.

While you are getting organized it doesn't make sense to go out and buy a bunch of organizing containers until you know what you have and everything has a home. Go the cheap route for a while using what's around your home until you have an idea of exactly what you have and what you need. In some cases, there is a lot to be said about having the right tool for the job, don't try replacing file folders with cardboard boxes. However, until you know how big a file drawer/box/cabinet you need, it is perfectly acceptable to store file folders in a cardboard box. Once you have all your files determined, then go looking for a file box/drawer/cabinet. Need help figuring out what to keep? Check out Managing Paperwork.

Before buying a compartmentalized container for catching clutter in your hot spots, put a basket, bowl, plate, tray or anything else you have on hand there first to start catching clutter. You want a good idea of what you are "catching" first. It doesn't make sense to get a small bowl for keys and change if most of what ends up in your container is mail and paperwork.

Likewise, it's pointless to buy a cd holder that fits 200 cd's if, after decluttering the house, pulling everything together and organizing it, you find you have 300 cd's. And, vice versa, it would pointless to buy the 500 cd holder to find you are only planning on keeping 150 cd's. Actually, forget cd holders altogether, rip your cd's to a computer, and box up the cd's and store them out of the way, under a bed for instance. (Legal disclaimer: you have to keep them if you are keeping the music. If you sell the cd you should delete the music from your hard drive.)

I hope those examples have convinced you to shop around your house for storage first, at least until you have a good idea of what you need to store. Don't forget to ask yourself do I really need it? Why buy something to store something you don't need. Plus you might find you really like your homegrown storage choices.

Photo from Real Simple

Use What You Have Organization Ideas

1) Use cream and sugar pieces from a coffee service to house cotton balls and swabs in the bathroom, use a cup to hold make-up brushes
2) Use a flower vase or a canning jar for a pencil holder in an office
3) Use an olive oil cruet as a soap dispenser at the kitchen sink
4) Use baskets, trays, bowls, or platters to corral clutter in your clutter hot spots
5) Cut and cover larger cereal boxes to house magazine collections
6) Remove labels from jars and lids to create containers for buttons, ribbons, pastas, rices, beans, hair clips, coins, or homemade seasoning blends
7) Use an ice cube tray in a junk or desk drawer to hold paper clips, screws, batteries, safety pins, coins, matches, etc.
8) Use an empty candy box liner (the type with an indent for each candy) or an ice cube tray to organize your jewelry
9) Use the bottom of cereal boxes, cracker boxes, pudding boxes, pasta boxes, as shallow drawer dividers just measure the depth of your drawer and cut the bottom of the box an 1/8" shorter. If you don't like the look of the cardboard, you can line the insides of the boxes with drawer liner or scrapbook paper.
10) Cover shoeboxes with pretty paper and use them as photo boxes or to corral items in open viewable areas, like office shelving.

Read the whole series!
Tuesday: My current areas organized this way
Wednesday: Pick a new area to organize - Drawers
Thursday: Laying it all out and putting it away
Friday: Transitioning to permanent organizing solutions

What are your ideas? Leave additional suggestions in the comments.

Also, if you have a particular problem area you'd like me to cover on Wednesday, let me know.


Preparing for a Flood

N
ot the typical post you'd expect to see here, but as a lot of what I'm going through right now would apply to any predictable natural disaster, it never hurts to be prepared.

A Little Back Story

I moved to Grand Forks, ND in the spring of 1996 to be with my hubby right after we became engaged. We spent many weekends blissfully planning our wedding and house shopping for our first home. We found a 100 year old house which had been added on to and remodeled several times and we going to need a lot of TLC, but the price was right. Because of the crazy amount of snow we got that first winter and the ice storms and quick thaw that spring, I started to hear talk around town about flooding and needing flood insurance. I was new to Grand Forks, I had no idea that the river "flooded" every year. Most years it's no big deal, the river always leaves it's banks. That year people were talking about a record flood though, so I started pestering my soon to be hubby about flooding and flood insurance. We bought flood insurance on March 15th, it takes 30 days before it kicks in, and the river broke through the sandbags and all the city's efforts on April 17th. Since then, flood walls have been put in place which protect us to 63' and the levees to 60'.

Ill-prepared

In 1997, our preparations consisted of hauling everything out of the basement and main floor up to the second floor the night before we flooded. No one really thought it was going to flood, until it was happening. The assumption was that it could be stopped with sandbagging. We left our house at 3am when the sirens went off in our neighborhood and we headed west. We had a small suitcase with a few days worth of clothes, and our puppy. We thought we'd be coming home in couple of days, and had no expectations of water getting to our house. We stopped at a friend's house about 30 miles west, in Larimore, for the remainder of that night and then continued on to Devil's Lake to my brother-in-law's in-law's at the time.

We were ill-prepared for the reality of the situation, we were gone for a little over 2 weeks from Grand Forks and our house was uninhabitable for 3+ years. Yes, you read that correctly, years. Our basement completely collapsed and we had flood insurance, but it was 3 years before we finally got a check to cover the repairs. In the meantime, we moved to Illinois to get a bit of a fresh start and continued to make mortgage payments on two houses. In retrospect, maybe we should have just walked away, we had been in the house just under a year, but we didn't. We moved back to Grand Forks in 2002, back into the same house with it's new basement. We have since sold that house and now live on the south side of town in a single story home. We no longer have a second story for our belongings and the water levels have been rising yet again.

Fargo is currently scrambling with sandbag central, and we are expected to get an awful lot of water. Thankfully, as the month winds down we are no longer expected to flood here in town in Grand Forks, if the flood walls do their job. We still have a lot of water and it's supposed to snow 8 out of the next 10 days. My backyard is starting to look like a swimming pool. The ground is so saturated that there is nowhere for the water to go. As of 2 weeks ago, I was beginning to prepare for a flood and figured this information may be helpful to some. My biggest concern at this point is sewer backup and ground water. I'm assuming the flood walls will hold.


Natural Disaster Preparation

Determine the safest route to leave town from where you are in the event of a natural disaster requiring evacuation.

Have a family meeting and form your family emergency/evacuation plan. Depending on the circumstances family members may not be together when the time comes to evacuate. You need to designate a safe place to meet up. Make sure everyone has phone numbers and addresses of determined meeting places.

Determine a point of contact outside of the affected area that people can call to get updates. You don't want everyone calling your cell, when you might be needing it for emergencies. This way you can keep one person completely informed and they can relay messages to other family and friends.

Put together copies of all important documents including proof of immunizations, proof of insurance and phone numbers to call to file claims. Include a home inventory and a video of your possessions. Yes, you can document them as you are cleaning up the wreckage, but pieces may break, be gone or be otherwise unrecognizable after a disaster.

Put together a large plastic tote containing battery-powered flashlights and radio, first aid and medications, rain gear and warm clothing, sleeping bags or bedding, several days worth of canned foods and bottled water (at least 3 gallons per person), a can opener and any other personal items you must have for health and safety.

Check with your insurance agent to determine if you are covered and what steps need to be taken in the event of a natural disaster. For instance, flood insurance has a 30 day waiting period before it is active. Depending on the natural disasters common to your area you may be required to always carry coverage, or just carry coverage during times when the possibility of a disaster is increased.

Learn how to shut off your water, electricity, gas, etc. in case you are instructed to.


Flood Preparations

If you live in a flood prone area:
Install backflow plugs or valves to help prevent sewer backup.
Install sump pumps with backup power, test your sump pump twice a year. (Sump pumps should not pump into the sewer system, they should pump out to the berm!)

A flood watch/warning has been issued for your area, now what?

Notify the local authorities if you have someone living with you that may require a medically assisted evacuation should flooding become imminent.

Keep your gas tank full and your vehicle ready to go at all times.

Keep the emergency tote in the vehicle and your important paper copies easily accessible at all times.

Pack a suitcase with 4-5 days worth of clothing. Be sure to include at least one pair of workboots/sneakers, jeans and work gloves per adult, if you come back to devastation, you don't want to be walking through it in sandals and shorts!

Review with your family your evacuation plan.

Keep your cell phone charged and charger handy.

Let family and friends know who the point of contact will be outside of the flood area.

Move all furniture and valuables to the highest point in your home. In a single-story home this may mean piling everything on top of tables, beds and counters. Bookcases may topple, keep that in mind for valuables.

Pack up whatever irreplaceable items you can to take with you.

If you have a lot of irreplacable items, and disaster is imminent (not if, but when) then consider renting storage on higher ground for your items.

Keep yourself informed and stayed tuned in for updates on the weather forecast.

Take evacuations seriously! Nothing is worth your life. Leave as soon as you are told to. Don't drive into standing water, abandon your vehicle if it stalls in water. Get to higher ground as quickly as possible.

If there is a danger of flash flooding, be prepared to leave at a moment's notice. You may not have much, if any, time to get to safety.

For further information, I recommend reviewing the CDC's Preparedness for All Hazards and the Specific Hazards information for the disaster most likely to affect you. In the meantime, I feel for those currently being evacuated in neighboring cities, and hope we are kept safe.

I don't know who took these, I would guess a reporter. The last image is of the fire-damaged buildings downtown, and made the cover of many national newspapers in 1997.

Edited to provide credit: my friend Becca said these were taken by Eric Hylden of the Grand Forks Herald and he received a Pulitzer Prize for the photos he took during the flood.

Spring Cleaning Checklist

I
've been busy with so many little things that I haven't gotten a chance to get started on my spring cleaning. I'm getting started this week, definitely won't be done by the first day of spring! However, I'm hoping by the end of March.

Here's my quick list if anyone wants to join me:

Spring Cleaning Supplies
Image by James Steidl text added by me

Spring Cleaning Checklist


Wipe down surfaces, walls, trim, fixtures, electrical covers, and windows
Polish silver, brass, copper, and other metals
Wipe down chandeliers and lighting fixtures
Empty and clean out refrigerators, freezers, ovens and vent filters
Replace furnace filters and vacuum and clean all household vents
Dust and vacuum all fabric surfaces
Vacuum or clean lampshades
Clean all window treatments
Wash all windows and mirrors
Swap out storm windows with screens
Swap winter for summer clothes
Swap winter for spring décor
Replace lightbulbs, batteries in safety detectors and check fire extinguishers
Vacuum and clean all carpets and rugs as needed
Flip/rotate mattress and freshen pillows and couch cushions
Wipe or vacuum out drawer interiors
Clean out closets and cabinets
Repot plants as needed
Start garden seedlings
Hold a garage sale and donate items

Download a PDF version

I also put the list in my left sidebar, I'll mark off as I complete items there. I only have a few hours after work during the week and I need some me and blogging time as well, so don't expect too much to get done on weekdays!

Recipe Organization

A
s I mentioned in my Good Things book post this week, I desperately need to go through and organize my recipes. I have a terrible habit of bookmarking a ton of recipes to try and never getting to them, that doesn't even include all the recipes I've collected from books, magazines, friends, and family. Just based on the number of recipes I've bookmarked or saved from the internet alone I could make a new recipe everyday for the next 5 years and still have more to tackle.

Good Things - Organizing Recipes

New Recipes or Old Favorites?

They say variety is the spice of life, but really, if you are like me, you have favorite recipes... your family has favorite recipes... and you tend to make those same recipes. We sprinkle in some variety here and there, but our favorites tend to keep making their appearance.

So, I know I'm not going to try a new recipe every day for the next 5 years. It's time to purge.

My Current System Isn't Working


My current system for clippings and tiny recipe booklets is a magazine file box covered in contact paper. It doesn't work! I can never find anything... they are all contained, but I don't use it because there is no filing system or index to it at all. There are only a few sheets I reference in it and they are at the very front. I've been holding on to most of them because they came from my great-aunt when she passed. I need to be honest with myself though about whether I really need to keep all of it. She was famous for her fudge, it's a recipe I will treasure forever, but a lot of them are clippings from articles of recipes I don't ever remember trying. I'm guessing she had the same unhealthy addiction to recipe clipping as I do. Instead I'll go through them and offer them up to anyone who wants them and then part with the bits of paper.

Now, what to do with what I keep?

Food Magazine Clutter?

I do have a few food magazines, but how often do I really reference them. Not very. I'll make a few recipes the first month, and then it just sits. Plus most of the magazines have their recipes online, so I'll be checking the website before I decide to keep the magazine. If that particular recipe is not online, I need to scan or clip it rather than keep the entire magazine. It seems like more than 50% of a magazine is ads, so I'm wasting a lot of space storing ads for 1-5 recipes per magazine.

Some sites to check to name a few (let me know of others in the comments and I'll add them to the list):
Taste of Home
Gourmet
Recipes from the following Magazines: Cooking Light, Coastal Living, Cottage Living, Health, Oxmoor House, All You, Real Simple, Southern Living, and Sunset

Other Recipe Sites

Other options for finding recipes online so you can throw away the paper (let me know of others in the comments and I'll add them to the list):
AllRecipes
Chow
ChowHound
eGullet
epicurious
FoodieView
GroupRecipes
RecipeZaar

Food Blogs

I also couldn't even begin to touch on the numerous food blog options out there (I have 29 in my feed reader 'Cooking' category, so I'll limit this to the ones I've made recipes from):
Baking Bites
Chocolate & Zucchini
delicious::days
Full bellies, happy kids
Orangette
Seriously Good
Tartelette
The Kitchn
The Pioneer Woman Cooks
Wild Yeast

There are also countless other bloggers that intermingle recipes with personal or crafty posts that I've made recipes from:
3 Sides of Crazy
Angry Chicken
Curly Pops
Foxgloves, Fabrics and Folly
Jane Brocket
Posie Gets Cozy

Magazine and Paper Archiving

I like the idea of typing in recipes and having the clutter free digital copy, but you run the risk of transcribing errors: Missing an ingredient, incorrect amounts, tsp instead of tbsp would be a very easy mistake. So, how about scanning in the recipes? I do like the idea of Scanalog, but I don't see anywhere that indicates you can search on text. I think you are stuck searching based on whatever keywords you assign when you scan the item. Please correct me if you use the software and I am incorrect in stating this. Scanalog has no free trial to download so I can't make any recommendation either way.

I'd actually rather use something like Evernote or OneNote that will not only find any keywords or notes typed in the software itself, but also in scanned images (Scanalog doesn't seem to have this feature either). As a quick example I typed Mishmash in photoshop, saved it as a .jpg file and pasted it into OneNote, then searched for Mishmash (yes it's an odd word, but I had to think of a made up word with no possibility of already existing).

OneNote Example:

Note: Remember Mishmash is not text, but an image.

Now that is convenient, but Evernote has a much better text recognition engine. My opinion, but the proof is in the pudding, so to speak.

EverNote Example:

See those extra handwritten looking fonts? The only one that Evernote didn't recognize clearly was the 2nd. It recognized that as JunkandMishmash, with no spaces, so it wasn't found. The other two it recognized just fine. They aren't in the OneNote example, because OneNote didn't recognize them at all so I left them out.

OneNote is $100, EverNote is free/$45 per year depending on how you use it. Want to use this for recipes and never sync to the web or another computer, you can turn off syncing and it's free? I know it will be a bit of a project, but I'm leaning towards scanning my recipes.

Recipe Organization Plan

My plan for organizing starting with scraps of paper, then booklets, then magazines and finally infrequently used cookbooks:
  1. Letting go: I'm going to toss and pass on any recipes that I know I will never make.
  2. Scan recipes and let software catalog them: I'm going to try both EverNote and OneNote and see which wins. I already use OneNote for other stuff, so it might make more sense to keep everything together. However, if EverNote does the better job with scanned text images, I will use EverNote.
  3. Honor an expiration date: EverNote and OneNote both date items. I'll keep untried recipes in one notebook and tried ones in another, if it hasn't been tried within a year and I didn't clip it for a particular occassion coming soon, it should go.
  4. Keep the favorites: There is no need to keep 15 chocolate chip cookie recipes, pick a favorite cakey, crispy, and chewy recipe. As I find a new favorite, I'll replace the existing favorite, don't keep both.
  5. Keep a recipe index: I plan on keeping a running list of the recipes that I try and what my thoughts were on them. I'll also keep a tally of how often I make it, once I've made it 5 or more times I'll transcribe it onto a recipe card for a permanent home in my kitchen. My computer is in the next room and I don't care to bring it in the kitchen where it could get spilled on or worse.

This needs to be cleaned out, so I can fit my favorites and not just every random recipe scrap.


Download a Free Recipe Organization Pack

I thought I'd provide a little free download for anyone who wants to use it. You can buy blank recipe cards from Avery and print your own, here are some recipe cards, recipe labels and a recipe notes worksheet for your home manual. I hope you like them. They are in Word 2007 format, if you'd like another format, let me know in the comments and I'll do my best to accomodate you. You can view Word 2007 in earlier versions of Word with this converter.

Download Recipe Organization Pack

Related Posts:
Want to create your own home manual?

Managing Paperwork

What's the Homemaking September ShapeUp! all about?

I know it's October and this is a bit late in coming, it was the most involved post to put together. Hopefully, I've covered most everything.

The last bit to tackle is paperwork. How often are people buried by mounds of paperwork, not knowing what they have to keep so they keep everything! Just in case...

Do you ever feel like this?  I used to.

Let's attack paperwork in three phases. The first phase is the trash, shred and sort phase; the second is the file and scan phase; and, the third is the maintenance phase. If you have an entire afternoon free to get up close and personal with your paperwork, feel free to combine them.  Otherwise, get the first phase done, and spread phase two out over a month and start phase three right away to keep on top of everything.

Now, when I say spread the file and scan phase out over two months, I don't mean leave the piles all over your dining room table! Just take the piles and put them directly in files, then each day pick a catagory, for instance Tax Pile. Pull your tax pile folder(s), separate the file into piles by year, label file folders according to each year, scan in anything you want to keep electronically, put the appropriate pile into the appropriate folder and refile. This way you won't have piles on your dining room table, and it's somewhat organized until you take the time to sort through it. Within a month you'll have an organized system going forward.

So, let's get started.

Trash, Shred and Sort


First, let's gather all our paper work together. Grab a trash bag, recycle bin and a collecting bin and go through your paper gathering areas, kitchen, mail drop, offices, etc. and gather all the paper items. This includes all paper items: bills, lists, magazines, catalogs, schoolwork, birthday cards, everything paper... The exception would be paper for scrapbooking or other hobbies that are in their rightful places. Throw away or recycle the glaringly obvious items: catalogs, junk mail, flyers, empty envelopes, etc. and put everything else in the bin. Most paper can be recycled, check with your recycling center to find out if they have any restrictions. (Definite restrictions: Manilla envelopes - the dark yellowish-brown ones, and flourescent paper)

If the room you'll be filing it away in has enough room to spread out, take your bin, trash bag and shredder to that room. Otherwise, use a room that you can spread out in, don't spread out until you can tackle it all at once.

We'll start sorting through the bin. Most people will have a few basic piles, but include others as they are needed, especially for those running a business out of your home.

Action Items pile: These are items that have not been addressed and something needs to be done with it. For instance, bills to be paid, tags to be put on your vehicle, notes regarding phone calls to be returned, taxes to be filed, receipts to be turned in for reimbursement, etc.

Tax Related Items pile: Any items related to taxes and tax deductions, bills or credit card statements with tax deductible items listed, work related receipts you are not reimbursed for in other manners, donation receipts, medical expense receipts, 1099's, sales tax credit receipts (some states, ND is one, has a cap on sales tax, but it's up to the purchaser to file for it), etc. Pay stubs: Until you get your W-2 keep all in the current year, then shred all but the last 5. The last 5 can be shredded after you get your first 5 in the next year. You want to keep them though in case you end up looking for a new job or applying for a loan.

Loan Documentation pile: Any documents regarding loans or mortgages, including anything that was signed and copies of any lien waivers.

Proof of Warranty pile: Any bills or receipts needed for proof of warranty, and any warranty related paperwork. If you no longer own the items or the warranty is expired, shred the documents.

Manuals pile: Only if you currently own the product, otherwise toss it.

Insurance pile: All current insurance related on your life, house, car, other recreational vehicles, medical, dental, etc. This includes receipts related to big ticket items no longer covered under warranty for proof of value, for instance: electronics, jewelry, appliances, art, collectibles... If you no longer own it, unless you have open claims on the policy, there is no need to keep the policy information or related cards for vehicles. Shred anything insurance related that is not current.

Pension Plan/Retirement/Investment Account pile: All stock certificates, year-end statements, anything related to the current year, documentation regarding vestment schedules, signed documents or letters regarding rights to future retirement benefits. All other documentation can be shredded, if in doubt, ask your accountant.

Bills pile: Any bills that are current and paid, but payment has not yet been verified; any bills currently in dispute; and, any bills consisting of prepayment or advanced payment for long-term on-going projects. All other bills, not previously addressed, should be shredded. Once payment has been made on a bill and you have verified payment has cleared the bank, shred the bill.

Receipts pile: Receipts not related to a warranty, but still within the timeframe for an exchange or refund. Most other receipts can be tossed, or shredded if there is account/customer information on them.

Bank Statements pile: All bank and credit card statements, not in a previous pile. Once the charges, checks, deposits etc are verified these can be shredded. Since you are disposing of all receipts, if you want to maintain a record somehow. Scan these items in, then shred them. You don't need to keep them.

House pile: Anything related to house maintenance, as long as you still own the house.

Vehicle pile: Anything related to vehicle maintenance, as long as you still own the vehicle.

Work piles: If you work from home, tailor these piles to what you do and determine what you need to keep.

Technically, that's the end of what we HAVE to keep... If we stopped there most people would still have a large chunk of papers left in their bin.

Your Schoolwork pile: If it's your school work from college, keep the papers for the current term, toss them once you receive your report card. I can understand wanting to keep a Master's Thesis, or some papers which may be a part of a class which will be built on in another semester. However, once you have your degree, consider letting it all go.

Your Kid's Schoolwork pile: You can't keep everything and they won't want it all later. I recommend a top ten scenario and let the kids choose! Keep each week's papers, at the end of the week, pick the top two choices. They may not be the best grades, so let them pick what means the most to them. At the end of the month, of all the ones chosen, have them pick their favorite 5. At the end of the quarter, have them narrow it down to five again, and again at the end of the semester. By the end of the year, you will have the top 5 from each semester. If you have a favorite few that they haven't chosen, keep them aside, but you shouldn't have more than 3 favorites that weren't chosen by your child each year. For large projects, take pictures and ask your child to write a bit about it (Science fair projects come to mind), keep that instead of the large foam board stand-up's, volcano's or other large created items.

Momentos pile: You don't need these items at all, they are kept for sentimental reasons. I'm not going to tell you to toss it all, I'm not heartless. Toss anything that has no meaning for you.

Magazines and Newspapers pile: Clip items out that you want to keep, the rest should be donated or tossed after it's read. If this pile is overwhelming, be realistic about what you can really read, consider changing your subscription. We changed our newspaper to a weekend/holiday subscription. As much as I'd like to, I don't have time to read a newspaper daily. If you are getting far more magazines that you can realistically absorb in a month, consider cancelling your remaining subscription, or having it forwarded to a friend or relative that may like it. I'm whittling through my magazines, this pile was the hardest for me to own up to.

Catalog pile: You can find almost everything in a catalog online, flip through it, if you like, but don't keep it. You'll get another soon enough. If you get a lot of catalogs, especially ones that you never order from or if they have complete shops online, consider calling the company and ask them to stop sending you catalogs.

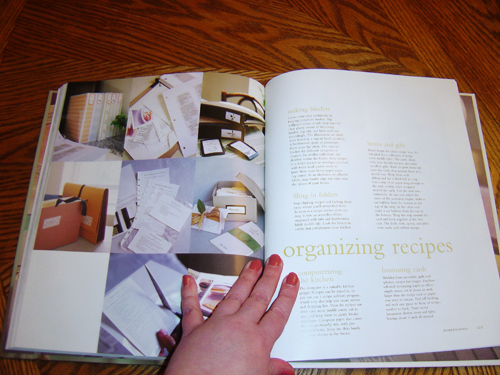
If you are like me you probably need a Recipe pile and a Inspiration/Decorating/Furniture Notes pile, go ahead and create them.

You may have other papers at this point, address them as needed, but be reasonable and if you are wondering whether you HAVE to keep it, do a quick search online.

Back to the top


File and Scan


Congratulations, you've gotten through the sorting of it all! Now for the filing and scanning of it all.

First, you'll need file folders, look at your piles and figure out how many files you will need. Make sure to count one for each tax year, one for each loan, etc.

Pretty File Folder Options:
Anthropologie has some gorgeous options, I'm particularly fond of the top one. Who wouldn't like filing in these?

Wallpaper Designer File Folders
Emma Designer File Folders
Sophie Designer File Folders
William Morris Clover File Folders
White Roses Decorative File Folders

Now you'll wonder why I call this section file and scan. I'm guessing a lot of people don't feel comfortable trashing a lot of the bills and other things I said to throw away. Here's where the scanner comes in, rather than saving all those pieces of paper, scan them in, then feel free to throw them. Now, don't just scan these to your desktop, give it some thought and set up a folder structure to make it easier to find everything later. I recommend using file names that are a combination of bill name and date in the format YYMMDD, you can then sort by name and it will sort nicely for you.

Scanning is the perfect option for a lot of the schoolwork pieces you want to keep, that don't make the final cut.

For now, filing will be a quicker option, but try to set aside 10-15 minutes a few times a week to get through the items you can't let go of, but really don't need to keep.

Also, you need to have a plan for the momentos so they don't get lost or damaged. If they are that important to you that you want to keep them, keep a memory box or something to store them in. Consider digital scrapbooking to preserve some of these items. You'll have the item scanned and the memory, without having to store the paper it's on. If you have items of significant value intended for long-term archiving, use acid-free archival storage for it to help prevent degradation over the years. Just remember that if the items being stored aren't acid-free, this will help slow degradation, but will not prevent it.

Acid-Free Tissue Paper
Acid-Free Box

Back to the top


Maintenance


1) Setup an inbox area
2) Commit to 15 minutes twice a week to take care of action items
  • Pay bills
  • RSVP to invitations
  • Place catalog orders (Discard the catalog afterwards)
3) Commit 15 minutes once a week to file and scan
4) Be ruthless, I open my mail by the trash and nothing comes into the house that I don't need.

Back to the top


It's easier to stay organized than it is to get organized. Hopefully, this will help you develop a manageable paperwork handling system.

View the Guide