If you know how to sew you may want to skip my ramblings, since you probably have the tools to round the edges and a better way to ruffle the tablecloth. This was just my method with minimal sewing tools, a machine and a pair of scissors and a large handful of pins. Oh and this take a lot of thread, I had to go to the store halfway through my project to get more thread. I realized after typing all this up that I didn't take as many pictures as I thought I did. Hopefully, it's still easy to understand.
Since I had no clue how it would turn out, I didn't want to spend a ton of money on fabric, so I headed to the local hardware store and picked up a paint dropcloth.
I measured across the table in both directions, then added double the height of the table to the floor to each measurement, then since I was adding a 4 inch ruffle, I subtracted 4 inches from both lengths. This gave me a 2 inch margin of error for my seems, if you are an experienced seamstress, subtract 6 inches for a 1 inch margin of error. Then I cut a rectangle that was the total length by the total width. Iron this.
To round the corners, I put the child's table on top of my dining table. I placed the table cloth on it so two adjoining sides just touched the table when pulled taut, then I piled books on top of the child's table so the table cloth wouldn't shift while I was cutting. Starting at one side I just pulled the corner fabric taut down to the dining table and cut the fabric so it skimmed the dining table (floor) until I got all the way around to the adjoining side. I then shifted the tablecloth to an opposite side of the table to do the next corner.
Now measure along the circumference of the table cloth and take that number and multiply by 4 for a nice full ruffle. Cut 5-6" wide strips from the drop cloth, until you get enough to sew together to make the ruffle. I did 6" wide strips, again I wanted a large margin of error for my seams. I trimmed everything up afterwards, next time I would only do 5" for a 4" wide ruffle. I didn't really know what I was doing and wanted to make sure I wasn't messing anything up.
So I sewed the strips together to get 1 long 6" wide strip. Then I ironed the strip, and ironed down 1" edges to get a 4" wide strip. Then I hemmed the edges and trimmed my excess fabric.
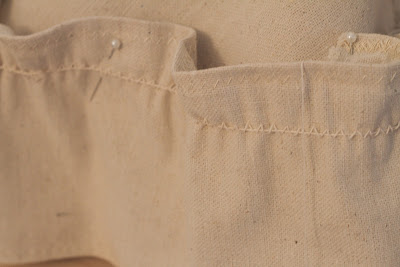
Now the crazy part!!! Since I have a super long strip of fabric there is NO way I was going to do the typical ruffling method of a really lose straight stitch and pulling one thread carefully for that much fabric. For sure I'd have broken a thread and ended up very frustrated. So I looked around the internet for a bit for ruffling methods. What I did was very easy, though it required very careful sewing. I was using a heavy-duty thread since I was working with such a thick rough material, so about 3/4" from the top edge of the ruffle I laid down one end of a new spool of the thread and zig sag stitched over the top of it, being very careful to keep the thread in the middle of the stitch and not catch it with my sewing machine needle. I used the widest zigzag stitch I could.
 |
| Zigzag over a thread, pull the straight thread to bunch up the ruffle |
Once I was done I measured the fabric strip and using safety pins I pinned the fabric at 1/4, 1/2 and 3/4 the length of the fabric. Using the pins as guides I could make sure the fabric was somewhat evenly ruffled and make sure that my final length of the ruffle would match what I needed to sew around the tablecloth. So holding tight to the thread that you laid down in the middle, gently start pulling it and bunching the fabric up.
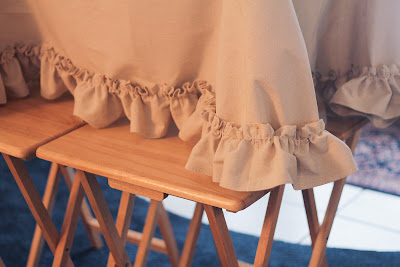
After it is uniformly bunched and the right length, use about 8 pins to roughly pin it to the tablecloth to check for length. If you are satisfied with the length, unpin the ruffle and sew the ends together. You should now have a big long ruffled ring of fabric. Now carefully measure and center the tablecloth in the center of the table and every 3-4" inches pin the ruffle to the table cloth so it will just skim the floor. (I pinned mine up on tv trays, it was easier to see the length.)
 |
| All pinned on, waiting to sew |
Once it is all pinned you are going to sew right in the center of the zigzag stitch you did earlier with a straight stitch.
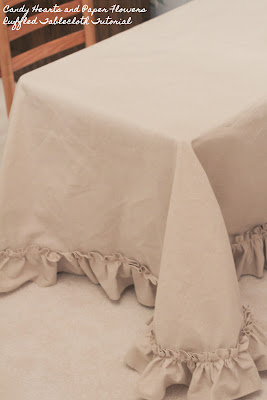
You are done!
I had no idea what I was doing and figuring things out as I went along and it took me the better part of an afternoon and evening. I also have a 2 year old daughter that I was getting interrupted by fairly constantly. She didn't like that I was holding her table hostage! However she loves her pretty table! Now to make slipcovers for her little chairs, I bought a "Making slipcovers" DVD, time to break that out again.


This turned out super cute! Wayne sewed drop cloth to make the curtains in front if those shelves in the garage - do you think he'd add a ruffle to them?? Ha! :)
ReplyDeleteIt'd be sort of hilarious to create a ruffle and just baste stitch it on to tease him :D
Delete